|
by: Andi @ Cirrutopia
How to win all the things.
by: Andi @ Cirrutopia
What is the dreaded (but hilarious) overpose and how do I stop it?
by: Andi @ Cirrutopia
Want to make those beautiful 3D-looking PetzPix? Here's how!
by: Andi @ Cirrutopia
adding wings to your PetzPix
by: Andi @ Cirrutopia
Want to make those beautiful 3D-looking PetzPix
by: Andi @ Cirrutopia
making your PetzPix into a vector image
by: Andi @ Cirrutopia
adding wings to your PetzPix
by: Silver @ Silver's Petz Site
How to retrieve petz that have runaway in the game.
by: Andi @ Cirrutopia
learn what's going on in the [Ballz Info] section
by: Andi @ Cirrutopia
the rarely-used but awesome [Head Shot] section
by: Andi @ Cirrutopia
How to make your own AOL Chatroom... just in case you were wondering. File this under the same place as "What to do when your 3 1/2 inch floppy won't eject."
|
This tutorial will assume that you can complete the basic skills in the Shading & Highlighting Tutorial.
Prepare Your File
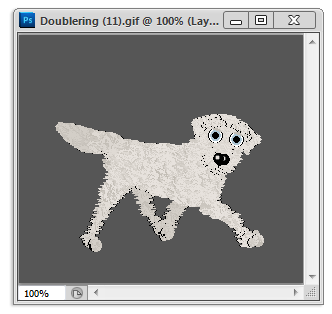 To start, I open my PetzPix, prepare the file as detailed in the Shading & Highlighting Tutorial by converting it to RGB color and cutting away the white background from the pet. I like to put a solid colored layer behind the pet. But this tutorial is about wings. I can freehand wings with the paint brush if I so choose, but today I'm going to use the Custom Shape Tool to at least get me a rough shape for the wings. To start, I open my PetzPix, prepare the file as detailed in the Shading & Highlighting Tutorial by converting it to RGB color and cutting away the white background from the pet. I like to put a solid colored layer behind the pet. But this tutorial is about wings. I can freehand wings with the paint brush if I so choose, but today I'm going to use the Custom Shape Tool to at least get me a rough shape for the wings.
 The icon for the Custom Shapes Tool is on the right. I happened to use a shape I downloaded that was already somewhat wing-like to start, but a simple oval works just as well. The icon for the Custom Shapes Tool is on the right. I happened to use a shape I downloaded that was already somewhat wing-like to start, but a simple oval works just as well.
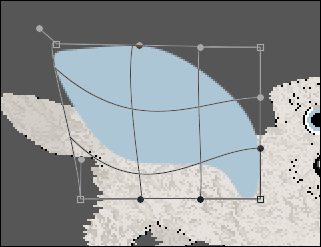  Next I click the Warp Mode tool (to the left) to further shape the wing. I play with this until I have a shape I like. Then I add a second wing in the layer behind the pet. Next I click the Warp Mode tool (to the left) to further shape the wing. I play with this until I have a shape I like. Then I add a second wing in the layer behind the pet.
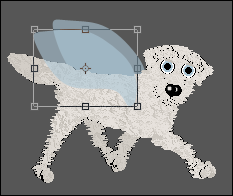
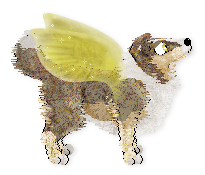
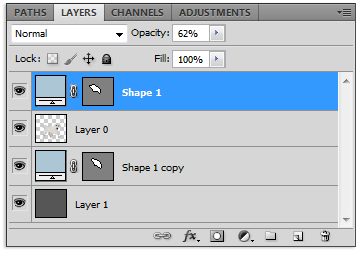 Here is how my layers are set up thusfar. At some point, I adjusted the opacity of the wings to make them translucent. Next, I shade my dog as detailed in the Shading & Highlighting Tutorial.
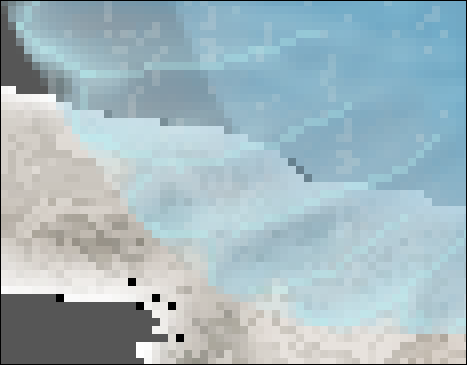
Now, I use the same method to shade and add details to the wings, using different layers above the wings, of course.
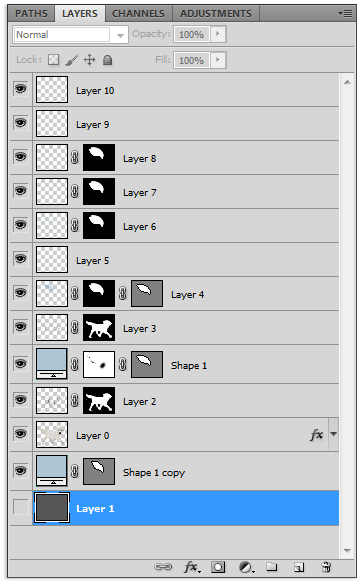
Here is what my Layers Palette looks like by the end:
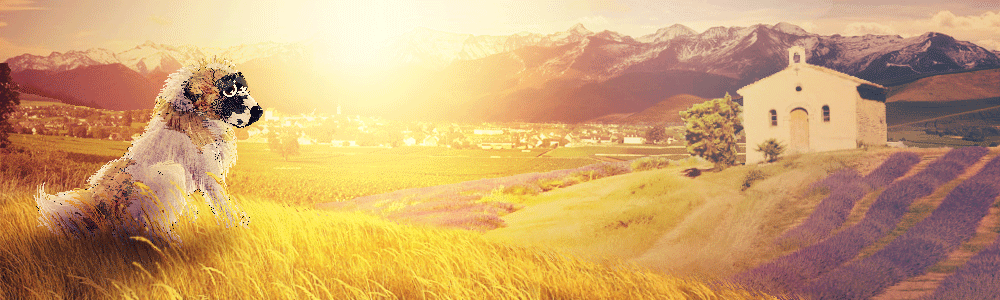
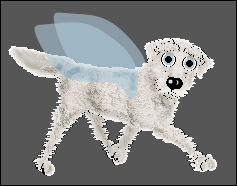
The Finished Product
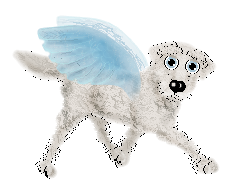 You're done! This tutorial doesn't go over how to save an image with a transparent background, but I will be writing one that covers this. I'd love to feature the work you made using this tutorial! If you want to share, just send your work to ! You're done! This tutorial doesn't go over how to save an image with a transparent background, but I will be writing one that covers this. I'd love to feature the work you made using this tutorial! If you want to share, just send your work to !
 |