|
by: Andi @ Cirrutopia
How to win all the things.
by: Andi @ Cirrutopia
What is the dreaded (but hilarious) overpose and how do I stop it?
by: Andi @ Cirrutopia
Want to make those beautiful 3D-looking PetzPix? Here's how!
by: Andi @ Cirrutopia
adding wings to your PetzPix
by: Andi @ Cirrutopia
Want to make those beautiful 3D-looking PetzPix
by: Andi @ Cirrutopia
making your PetzPix into a vector image
by: Andi @ Cirrutopia
adding wings to your PetzPix
by: Silver @ Silver's Petz Site
How to retrieve petz that have runaway in the game.
by: Andi @ Cirrutopia
learn what's going on in the [Ballz Info] section
by: Andi @ Cirrutopia
the rarely-used but awesome [Head Shot] section
by: Andi @ Cirrutopia
How to make your own AOL Chatroom... just in case you were wondering. File this under the same place as "What to do when your 3 1/2 inch floppy won't eject."
|
First, you must open up a picture from your PetzPix folder. Darker petz generally work better. I've chosen a black dali to work with.
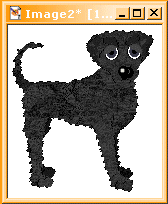
You need to select the dog, and not the white background. Do this by clicking on the "Magic Wand" and clicking anywhere in the white area around the dog. This should select the white area. Now you need to invert the selection so that the dog is selected. First hold down the Control (Ctrl) button on your keyboard. While you're holding it push down the Shift button, and while you're holding both these buttons down, hit "I". Now your pet should be selected.
First, we're going to highlight areas of the pet. Select the "Retouch" tool and set it on "Lighten RGB".
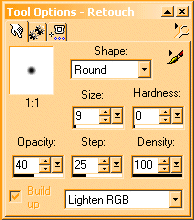
The above is what your "Tool Options" box should look like. Set the numbers to match those, since they work pretty well for this kind of basic highlighting and shading. Now, drag the brush over your pet wherever you want highlights. You'll get something like the dog below when you've finished this step.
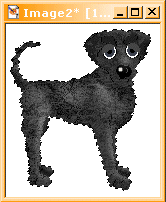
Now it's time to put some shadows in. Set your "Retouch" brush to "Darken RGB" and set the numbers the same as the ones in the box below.
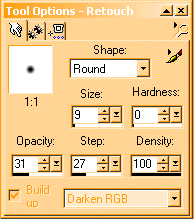
Now, drag the brush over your pet wherever you want shadows. You'll get something like the dog below when you've finished this step.
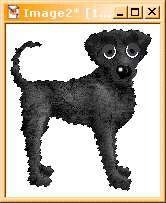
Now you can highlight the eyes. Here's a basic two-highlight eye. The larger box is optional.

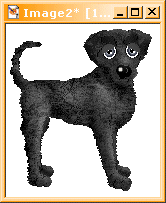
Sometimes, it's fun to shade the eyes as well. You can do this with the "Lighten RGB" and "Darken RGB" brushes you used for the dog's body. Here's an example of an eye that's shaded.

Now zoom out and you'll have your completed edited picture!
|


